
Why Your Subtitles Don't Fade to Black
How to fix the Premiere Pro subtitle fade problem using FFmpeg.
Why Your Subtitles Don't Fade to Black (And How to Fix It With FFmpeg)
You fade your video to black in Adobe Premiere Pro.
The audio fades. The footage fades.
But your subtitles stay visible as bright white text on a black screen.
It looks wrong, and fixing it inside Premiere is much harder than it should be.
This post explains why it happens and shows a fix using FFmpeg.
The Problem
Here is what a typical Premiere fade workflow looks like:
- Move your clip to V2
- Add a Black Video clip on V1
- Apply a Cross Dissolve or use "Dip to Black" (same result)
- Add an audio fade
Example timeline setup
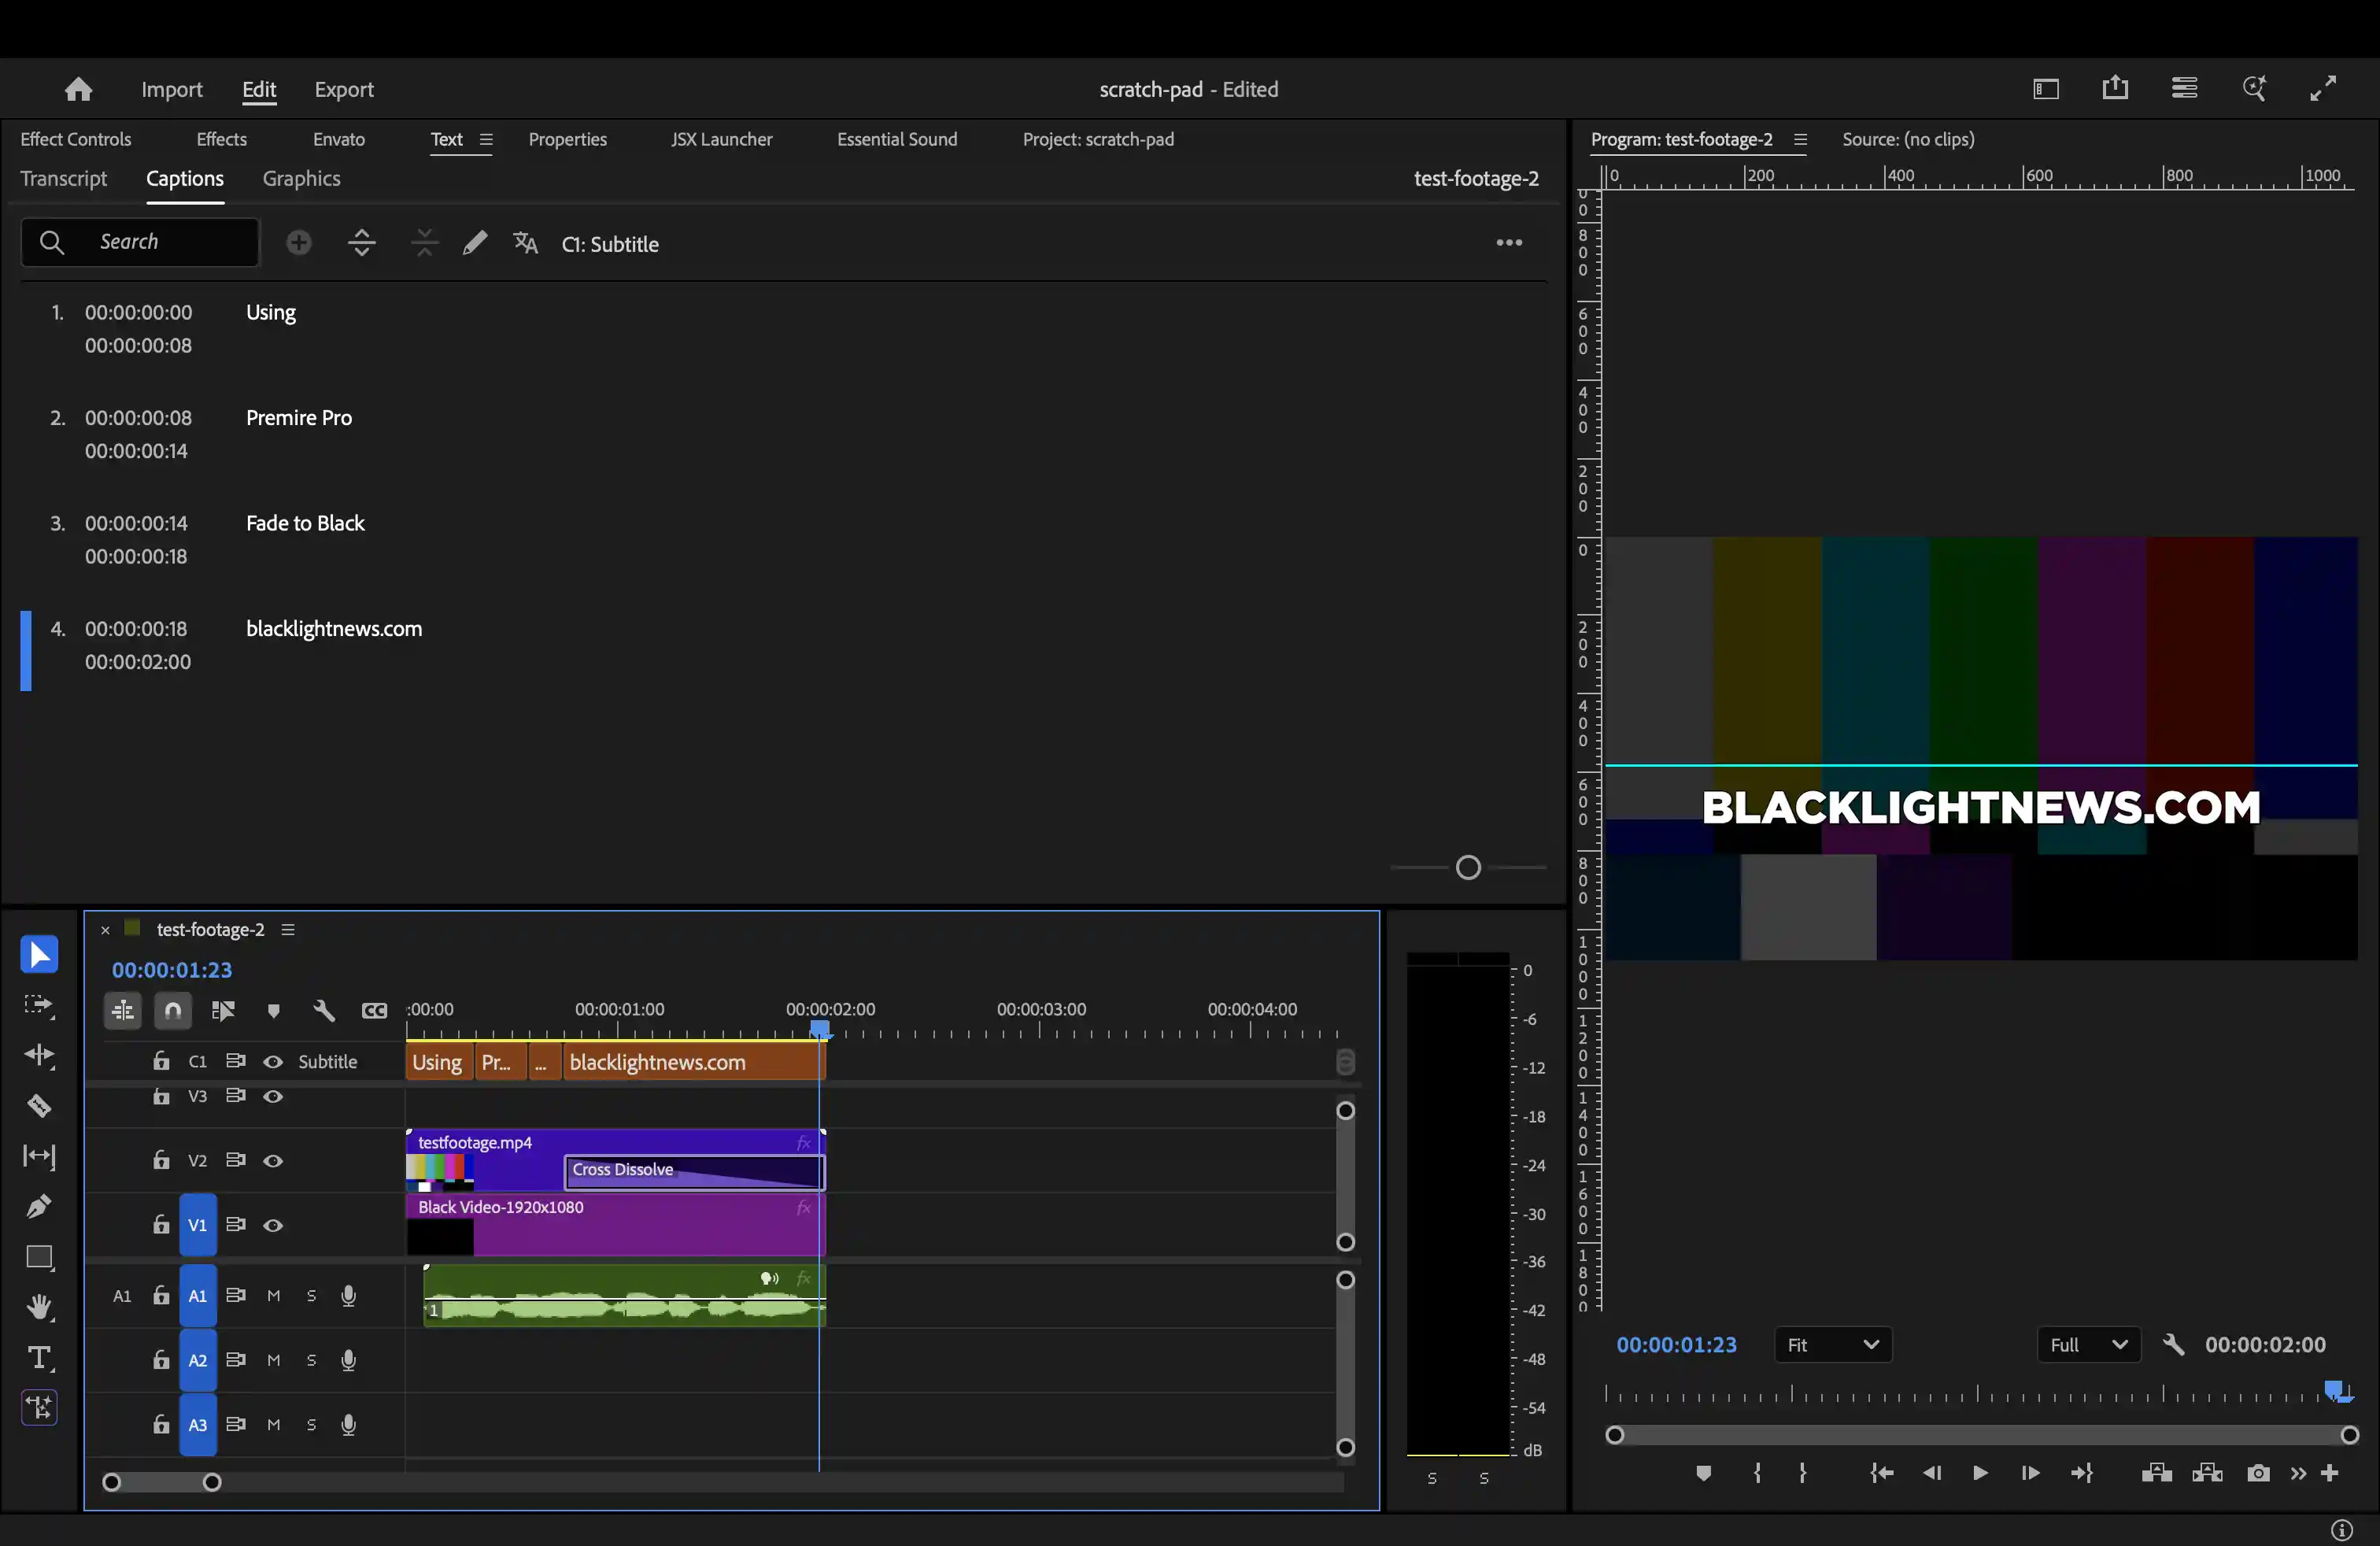
This is the standard setup people use when trying to create a fade.
What happens in Premiere

The last frames reveal the problem

Even at the very end of the fade, when the video is fully black, the subtitles are still fully visible.
This works for video and audio. However, subtitles live on a separate track called the caption track (C1), which sits above everything else.
That track is rendered independently. It does not respond to opacity, transitions, or anything happening in your video layers.
So when your video fades to black, your subtitles remain fully visible.
Why Premiere Cannot Fix This
You might try keyframing opacity on the captions, but native captions do not support opacity.
They are not treated like graphics layers, so you cannot fade them.
There is a partial workaround:
Select subtitle → Graphics and Titles → Upgrade Caption to Graphic
This converts the subtitle into an Essential Graphics layer, which can be faded.
However, this comes with important downsides:
- It is no longer a real subtitle track
- You lose proper caption export such as SRT
The Key Insight
The fade does not need to happen in Premiere at all.
Instead:
- Export your video normally with no fade, no black video, and no transitions
- Apply the fade afterward using FFmpeg
Because captions baked into the exported video, they disappear naturally during the fade.
The Result (What You Actually Want)

Everything fades together. Video, audio, and subtitles all disappear at the same time.
Quick Usage
./fade-out.sh your-video.mp4Done.
Copy This Script
Save this as fade-out.sh:
#!/bin/bash

fade_duration=1
crf=18

input="$1"
[[ -z "$input" ]] && { echo "Usage: $(basename "$0") <input>" >&2; exit 1; }
[[ ! -f "$input" ]] && { echo "Error: file not found: $input" >&2; exit 1; }

base="${input%.*}"
extension="${input##*.}"
output="${base}-fade-out.${extension}"

total_seconds=$(ffprobe -v error -show_entries format=duration \
  -of default=noprint_wrappers=1:nokey=1 "$input")

start_time=$(echo "$total_seconds - $fade_duration" | bc)

ffmpeg -i "$input" \
  -vf "fade=t=out:st=$start_time:d=$fade_duration" \
  -af "afade=t=out:st=$start_time:d=$fade_duration" \
  -c:v libx264 -crf "$crf" -preset veryslow \
  -pix_fmt yuv420p \
  -c:a aac -b:a 192k \
  "$output"

echo "Output: $output"
Make it executable:
chmod +x fade-out.shHow to Use It
1. Export from Premiere
- No Cross Dissolve
- No Dip to Black
- No Black Video
- No audio fade
- Just a clean cut at the end
2. Run the script
./fade-out.sh your-video.mp4The script will:
- Detect the video duration
- Calculate when the fade should start
- Apply a fade to both video and audio
Your output file will be:
your-video-fade-out.mp4What the Script Does
ffprobe gets the exact duration of the video
fade / afade apply fade to video and audio
-crf 18 gives high quality, near-lossless output
-preset veryslow improves compression efficiency without reducing quality
What Is FFmpeg
FFmpeg is a command-line tool for processing video and audio.
You give it a file and a command, and it handles the rest.
Example:
ffmpeg -i input.mp4 -c:v libx264 -crf 23 -c:a aac output.mp4It can convert formats, trim clips, extract audio, apply filters, and more, all without opening an editor.
Installing FFmpeg
Mac:
brew install ffmpegWindows:
Download from https://ffmpeg.org/download.html and add it to your PATH.
Linux:
sudo apt install ffmpegVerify installation:
ffmpeg -versionClosing Thought
This solves one specific problem, but it also points to a broader idea.
Sometimes the simplest fix is not inside your editor.
A single command can replace a complicated workflow. Once you start using tools like FFmpeg, you will find more and more places where that is true.